

I ran into an issue when I purchased WD HGST Ultrastar DC SN200 NVMe disks for my new VCF 9 production lab. The first thing I noticed was that the drives started flashing an orange LED, and the Dell caddy disk light was also blinking green. I searched all over the internet for good blogs and walkthroughs, but I had to test and piece together the information myself. Here it is—this walkthrough will clear the diagnostic mode for a drive that is stuck, using the process below.
- Install WD HGST DM and HDM Tools

- Install WD NVMe Drivers for SN200
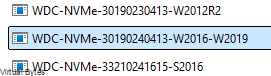
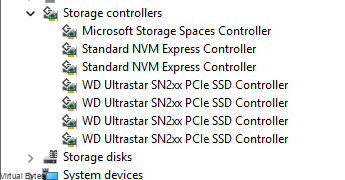
After the NVMe driver installation completes, refresh Device Manager. You will see the NVMe disks appear right away, without needing to reboot the system.
Key Issue: Drive in Diagnostic Mode
The updated get-state output shows Device Status = Diagnostic Mode. This is a special locked/protected state common on HGST/WD Ultrastar SN200 NVMe drives (often triggered after power cycles, certain errors, or factory conditions). In this mode:
- The drive is not fully accessible to the OS (may not show namespaces properly).
- Standard NVMe commands like format (via nvme-cli) will fail or be blocked.
- Windows Disk Management won’t see it as a usable disk.
- This explains why previous attempts (including dm-cli format) failed indirectly—advanced admin commands are restricted.
- ESX will see only the vmhba(x) adapter but not the disk.
Solution: Exit Diagnostic Mode Using DM Tools
The Western Digital Device Manager (DM) has a dedicated command to capture diagnostics data and clear/reset this mode.
Command Line Process
DM CLI has a capture-diagnostics command:
Start by executing the hdm scan command in your terminal or tool. The output should look similar to this

Start by executing the hdm scan command in your terminal or tool. The output should look similar to this

hdm.exe capture-diagnostics -a @nvme0 --file C:\diag_dump_nvme0.bin --clear-diag-data- -a @nvme1: Targets your drive alias.
- –file: Saves the diagnostic log (required; path can be anywhere writable).
- –clear-diag-data: This flag resets/clears diagnostic mode.
- If hdm.exe not found, it may be the GUI executable—check your HDM folder.
Or try with dm-cli.exe :
dm-cli.exe capture-diagnostics --uid 1C58SDM00005CD14HUSMR7676BDP3Y10023 --file C:\temp\diag_dump.bin --clear
(Run dm-cli.exe –help or dm-cli.exe capture-diagnostics –help for exact syntax.)
Follow with a cold reboot.
After reboot you should see all the NVMe SSD’s in Disk Manager.




2 comments
I have the same issue! Did you find any way to make the change permanent? It appears to come back with any significant server event (e.g. power cut). Seems risky deploying them to production.
Yes I have worked with a hardware engineer from WD and the issue is becasuse of the SN840s are ment for a storage array that has special firmware burned into the nvme and the 14th Gen servers cant understand the firmware after a reboot when ESX loads it and cuases the drives to lock.
Only way to fix is get the firmware or return the drives is what I ended up doing