I picked up a batch of sixteen used Seagate ST2400MM0149 drives for the lab. They are 2.4 TB 10K SAS disks, the kind that show up by the dozen on eBay after an enterprise array gets retired. The plan was to turn them into a TrueNAS pool and present it over NFS as principal storage for a VCF 9.1 deployment in the lab. I slid them into the shelf, opened TrueNAS to build that pool, and not a single one showed up. The only clue was this alert:
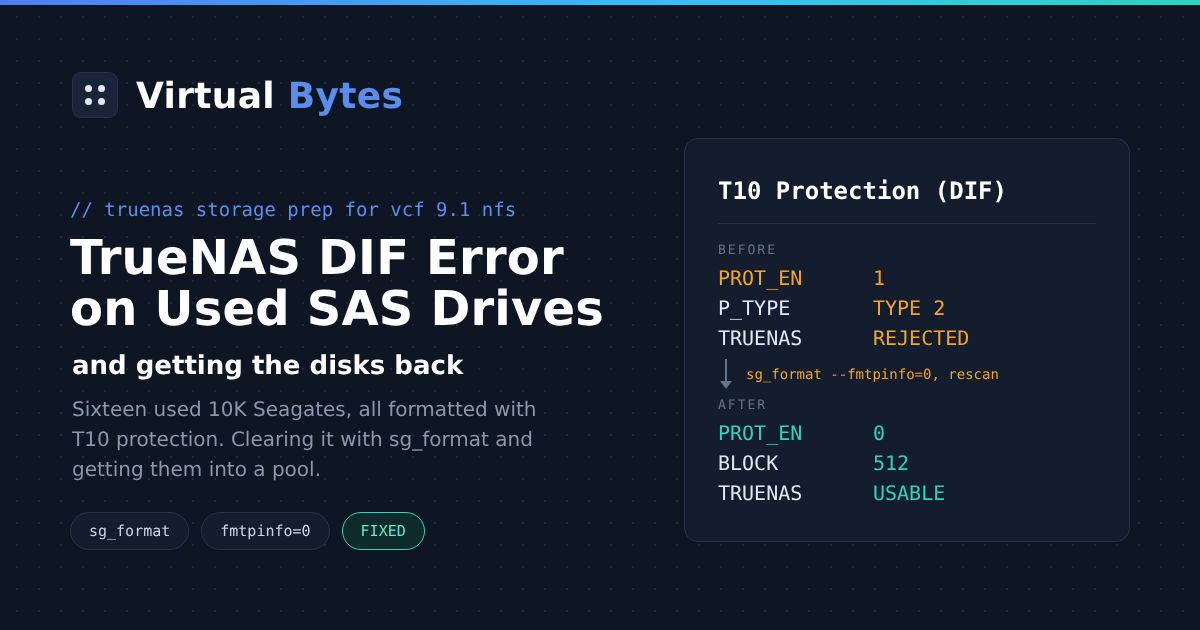
[EFAULT] Disk: 'sdd' is incorrectly formatted with Data Integrity Feature (DIF).If you buy used enterprise SAS drives, you will run into this sooner or later. The fix is simple once you know it, but there are a few traps along the way that cost me time. This post covers the whole process, including the parts that went sideways.
What DIF actually is
DIF, also called T10 Protection Information, is a feature where the drive stores a few extra bytes of integrity data alongside every sector. Storage arrays from vendors like NetApp, EMC, Dell and HPE often format their drives this way because their controllers use that data end to end. ZFS does its own checksumming and has no use for it, and current TrueNAS releases refuse to use a disk that has protection enabled. That is why the drives simply vanish from the pool wizard.
The cure is a low level format with protection turned off. That wipes the drive completely and takes hours, so plan for it.
Warning: everything below destroys all data on the drives you target. Double check which disks you are formatting before you run anything.
Get a root shell
The default truenas_admin account cannot talk to the disks directly, so smartctl and the sg3_utils tools will just return “Permission denied”. Become root first:
sudo -iI strongly recommend doing all of this over SSH inside tmux rather than from the shell in the web UI. The web UI logs you out after a while, and when it does your shell goes with it.
Pick drives by model, not by device name
Start by listing what the system sees:
lsblk -o NAME,SIZE,MODEL,SERIALThis is the first trap. Names like sdd are not stable. After a reboot partway through this job, my Seagates moved around and one of them landed on sda, which had been a boot SSD the day before. Any loop that hardcodes device names is a good way to format the wrong disk. Every command below selects drives by model number instead, which keeps the boot devices and existing pool members out of it. Swap in your own model string.
Check the current format
for d in $(lsblk -dno NAME,MODEL | awk '$2=="ST2400MM0149"{print $1}'); do
  printf "%-4s " "$d"
  sg_readcap --long /dev/$d | grep -oE 'prot_en=[0-9], p_type=[0-9]|Logical block length=[0-9]+' | tr '\n' ' '
  echo
done
Every one of mine came back the same way:
sdd prot_en=1, p_type=1 Logical block length=512Here is how to read that:
prot_en=1means protection is on. This is what TrueNAS is complaining about.p_typeis zero based, sop_type=1is DIF Type 2 andp_type=0is Type 1. Either way the fix is the same.- A logical block length of 512 or 4096 is normal. If you see 520 or 528, the drive came from an array that uses fat sectors, and you also need to change the sector size during the format.
Format with protection off
With 512 byte sectors, all you need is to clear the protection setting. This loop kicks off a format on every matching drive that still has protection enabled:
for d in $(lsblk -dno NAME,MODEL | awk '$2=="ST2400MM0149"{print $1}'); do
  if sg_readcap --long /dev/$d | grep -q 'prot_en=1'; then
    echo ">>> formatting $d"
    sg_format --format --fmtpinfo=0 --early /dev/$d
  fi
done
For drives with 520 byte sectors, add the size flag:
sg_format --format --fmtpinfo=0 --size=512 --early /dev/sdXA few notes on what you will see. sg_format pauses for about 15 seconds before each drive so you can hit Ctrl+C, which means a sixteen drive loop takes a few minutes just to get through the countdowns. The --early flag tells it to return as soon as the drive accepts the command. The format itself runs inside the drive firmware, so the loop finishes long before the drives do.
Monitor progress the right way
This is where I lost the most time. My first progress check looked for a percentage in the output of sg_requests --progress, failed to match it, and happily reported every drive as done within minutes. They were nowhere near done. When I went to verify them afterward, every drive answered with:
READ CAPACITY (16) failed: Device not readyThat message is completely normal while a format is running. It does not mean the drive is dead. Don’t panic, and don’t reboot.
The next thing I tried was sg_turs --progress. It works, but it keeps polling a single drive until that drive finishes, so in a loop it just sits on the first disk for hours. What actually works is a single status query per drive:
for d in $(lsblk -dno NAME,MODEL | awk '$2=="ST2400MM0149"{print $1}'); do
  printf "%-4s " "$d"
  sg_requests /dev/$d 2>&1 | grep -ioE 'progress indication: *[0-9.]+%' || echo "not formatting"
done
Run it twice about half an hour apart and you can work out a rough finish time from how far the percentage moved. Formatting all sixteen drives at once slows each of them down, and mine ran well into the night. I left them alone and checked again in the morning.
One more thing on rebooting. I did reboot while the formats were running, and in my case the drives carried on and finished cleanly. I would not count on that. An interrupted format can leave a drive reporting a corrupted medium, and then you get to start that drive over from zero.
Verify the result
When every drive reports “not formatting”, check the protection flag again:
for d in $(lsblk -dno NAME,MODEL | awk '$2=="ST2400MM0149"{print $1}'); do
  printf "%-4s " "$d"
  sg_readcap --long /dev/$d 2>&1 | grep -oE 'prot_en=[0-9]|Device not ready|format corrupted' | head -1
done
You want prot_en=0 on every line. If a drive still shows prot_en=1 or reports a corrupted format, run the format again on just that drive, this time without --early, so you can watch it complete.
Make TrueNAS notice
Here is the last trap. Even with every drive clean, the pool wizard still showed nothing but my one spare SSD. The kernel and the TrueNAS middleware both look at the disks when they first appear, and while the format was running the drives were answering “not ready”. Both layers need a nudge:
for d in $(lsblk -dno NAME,MODEL | awk '$2=="ST2400MM0149"{print $1}'); do
  echo 1 > /sys/block/$d/device/rescan
done
lsblk -dno NAME,SIZE,MODEL | grep ST2400
midclt call disk.sync_all
sleep 60
midclt call disk.get_unused | jq -r '.[] | "\(.name)  \(.model)  \(.size)"'
The rescan gets the kernel to read the correct capacity again. The disk.sync_all call returns a job number and makes the middleware refresh its disk list. The disk.get_unused call shows exactly what the Create Pool wizard is allowed to offer. If your drives are in that list, hard refresh the browser and they will be there. If they are not, reboot. With the formats finished, a reboot is safe and clears out whatever stale state is left.
Before you build the pool
These are used drives, so it is worth a quick health check before trusting data to them:
for d in $(lsblk -dno NAME,MODEL | awk '$2=="ST2400MM0149"{print $1}'); do
  printf "%-4s " "$d"
  smartctl -a /dev/$d | grep -E 'SMART Health Status|Elements in grown defect list' | tr '\n' ' '
  echo
done
Look for an OK health status and a low grown defect count. Any drive with a large count, or one that climbs between checks, should become a cold spare rather than a pool member.
The short version
- Used enterprise SAS drives often ship with DIF enabled, and TrueNAS will not use them until it is off.
- Check with
sg_readcap --longand fix withsg_format --format --fmtpinfo=0. - Always select drives by model or serial number, because device names change across reboots.
- “Device not ready” during a format is expected. Check progress per drive with
sg_requestsand be patient. - When the formats finish, rescan the drives and run
midclt call disk.sync_all, or just reboot, before you go looking for them in the UI.
Next up: NFS for VCF 9.1
With the drives finally visible, the next step is the reason I bought them in the first place: a pool exported over NFS v3 as principal storage for VCF 9.1. On the TrueNAS side, a few settings matter most:
- The NFS share needs Maproot User and Maproot Group set to root, because the ESXi hosts mount it as root. If that is missing, you get access denied errors or a read only datastore.
- Limit the share to the subnet your ESXi NFS vmkernel ports live on, and make sure NFSv3 is enabled in the NFS service settings.
- ESXi sends every NFS write as a sync write, so leave sync at standard and plan on a fast SLOG device rather than turning sync off.
I will cover the full share setup and the VCF side of the deployment in a follow up post. For now, sixteen 10K spindles that cost very little are ready to become a datastore. Worth the evening.